New Power Bus Connectors - A Recommendation |
||||||||||||||||||||
|
We have challenges with existing standard connectors Female and Male:
We are in the process of converting to Anderson Power Poles and 9 pin connections. Advantages:
The new connector wiring assignments are as follows:
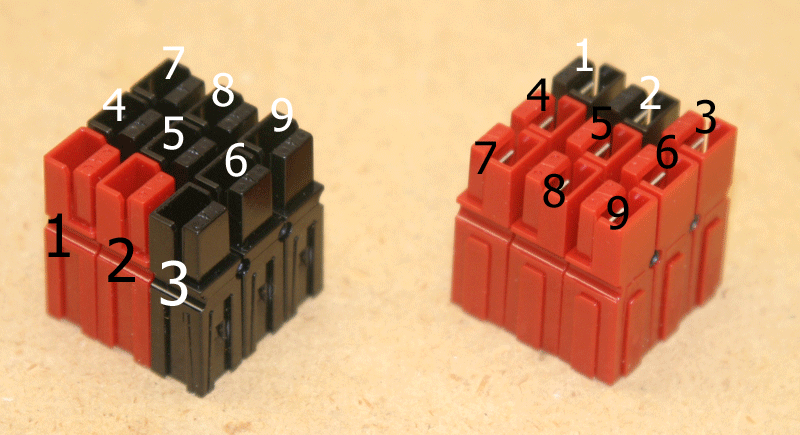
Anderson Power Poles are genderless. They come in a variety of sizes. We recommend the 30 Amp size. They can be connected together like lego blocks. Here is the geometry for our nine pin connection.
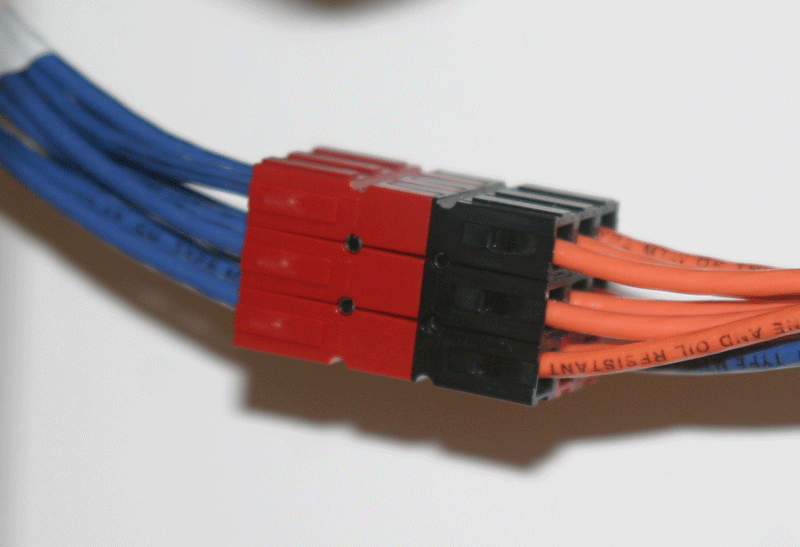
The connectors are put together into a 3 x 3 block. The block on the right is mostly red and goes on the right hand side of the module as you face it form the front (red-righty). The Front of a the module is the side that has the tracks. The back is the side that has the scenery. The left hand block is mostly black and goes on the left hand side of the module. Notice that 2 connectors in each block are keyed in the alternate color. This gives orientation of the location of pins 1 and 2. It is important to keep the rotation of each connector as pictured. There is an alternate way to connect them with each connector rotated 90 degrees in place. That would yield connectors that wont connect properly with these! Here are two connectors wired with 12 gauge wire and mated:
We recommend using 12 gauge stranded wire for the bus connectors and 16 gauge stranded wire for the drops from the bus to the tracks. (Its just a drag trying to solder anything thicker than 16 to the bottom of Gargraves tracks) Note that using 14 gauge for the bus and 18 gauge for the drops is also acceptable, but first druthers would be 12 and 16. We also recommend using wiring number tags for the wires instead of color coding. 30 Amp Anderson Power Poles can be purchased from PowerWerx. 30 Amp connector page. Power Poles are sold in sets. A set is 2 individual connectors. A module would need 9 sets. You will need a special crimping tool for power poles. I suggest the tool sold by West Mountain Radio. Also sold by powerwerx here. (Normal terminal crimping tools do a poor job of connecting power poles.) I have no connection to Powerwerx, Anderson or West Mountain Radio. I simply found these as the better prices on the internet. If you can find better deals, please let me know and I will share them here. I hope you find this useful! Tune in next time when we describe a method for connecting railroad signal wires using RJ45 Ethernet connectors! |
Tips and Tricks |
|
|
Tips |
|
Do you have a tip that you would like to share? Send an email to . As we encounter and solve problems we will try to share them here. Sometimes the solutions are just whimsy like super wide corners. |